
QOR Admin Tutorial
QOR Admin is a great admin interface creation tool but, just like gorm, the documentation sometimes lacks explanation and tutorials to help you get started
go
dev
admin
qor
2019/02/11 17:30
Introduction #
What is QOR? #
QOR is a set of libraries written in Go that abstracts common features needed for business applications, CMSs, and E-commerce systems.
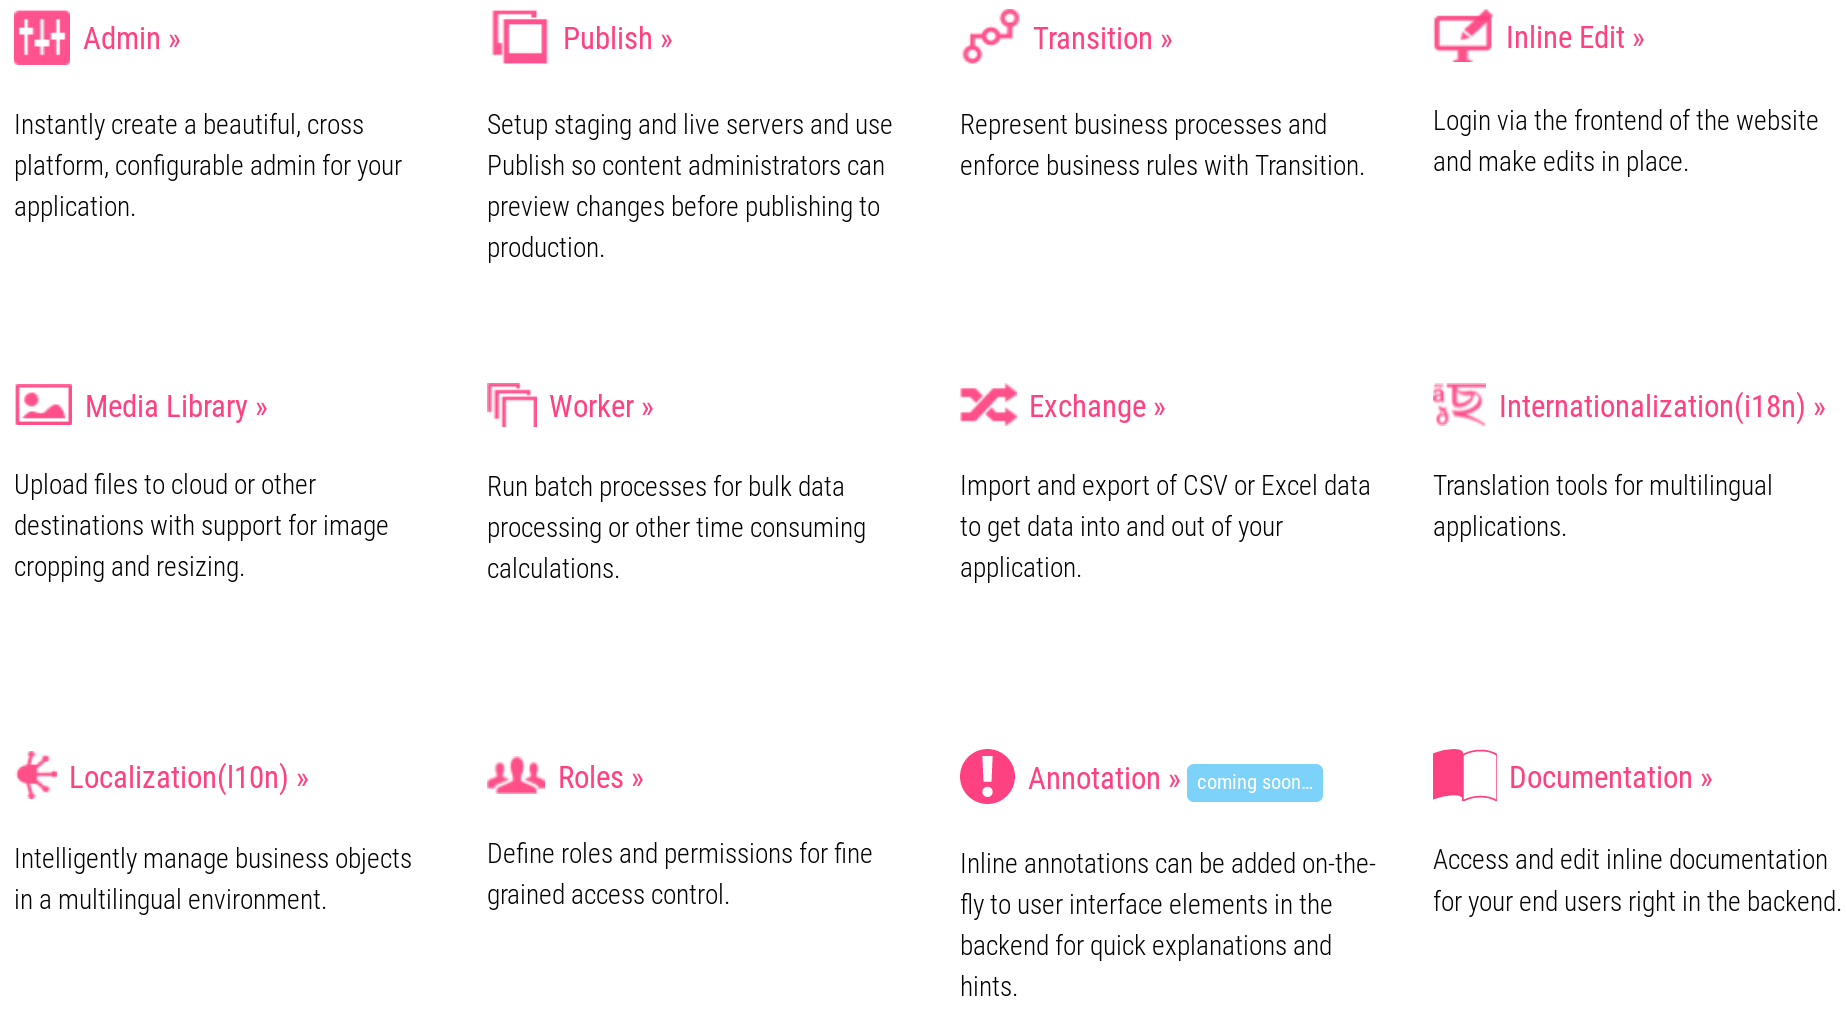
QOR is basically everything we need to run a full e-commerce website. But what interests us here is the admin interface. Let’s say we’re creating an API and store our data (stuff like your users, products, etc…) in a database. You just don’t need QOR to do that, you can use whatever router you’re used to work with for example. But QOR is a full framework, if you want to look at everything it can do, head to the getqor website and be prepared to be amazed because it can do so many things:
Although this article isn’t sponsored by QOR or anything like that, I think it’s a great piece of technology and the people behind it are quite amazing. They even have an enterprise package!
QOR Admin? #
Frameworks like Django give you an admin interface to manage your data. This is great because it allows you to display data in a web interface, modify it or execute one-shot actions on some records. For example, it’s rather easy to create a CSV export of one of your tables in the form of a single button that any admin can click on, thus avoiding the usual SQL query to export data, if you know what I mean.
It also enables to modify data and more importantly keep it consistent by writing your business rules directly in your admin interface. So we can prevent someone from modifying one of our products and set the price to $0 (or 0€, or whatever the currency, you get my point). Or prevent data loss. Or set specific behavior for certain fields. The admin interface use-case is then completely different from a dashboard that does only “read” operations to generate insights like Metabase (which is an amazing tool too!).
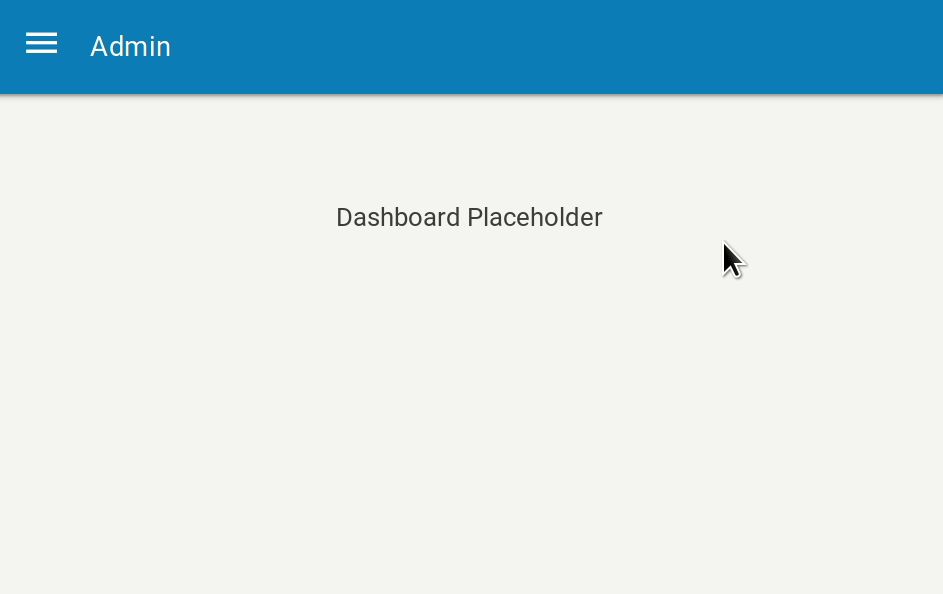
So QOR Admin is a component of the QOR stack. And the great news is: You don’t need the whole QOR stack to make QOR Admin work! Plus, let’s face it, QOR Admin is really gorgeous with its material design theme (but that’s subjective). The following screenshot is from the QOR Admin Demo:

Motivations #
Although QOR Admin is an amazing open-source lib and product, sometimes the documentation lacks a clear way to do things. This article’s goal is to act as a kind of enhanced documentation and tutorial. We’ll try to leverage the annoying steps of setting up QOR following its best practices and create some kind of package that could be reused quickly without having to overthink things.
Initial Setup #
QOR (in general and not just admin) is tightly coupled with gorm, mostly because gorm is an amazing ORM for the Go language, and also because jinzhu who created gorm also helped creating QOR. The main issue here is that if you’re not already using gorm, you might have a hard time using it “only” for the admin interface. For this reason we won’t cover the case where you’re not already using gorm for your API or web service.
This section’s goal is to provide a basic example of how to use QOR Admin and Gorm. We’ll be using this example throughout the article but if you already have a use-case where you’re connected to a database using gorm and already have some tables in there with the associated structs you can skip this part entirely.
PostgreSQL #
We’ll first create our database and we will be using PostgreSQL
with the uuid-ossp
extension to generate UUID as primary key. This is mostly useless for this
example, but it’s always nice to see another way of generating primary keys than
a simple uint.
postgres=# CREATE DATABASE qor_tutorial;
CREATE DATABASE
postgres=# CREATE USER qor WITH ENCRYPTED PASSWORD 'password';
CREATE ROLE
postgres=# GRANT ALL PRIVILEGE ON DATABASE qor_tutorial TO qor;
GRANT
postgres=# \c qor_tutorial
qor_tutorial=# CREATE EXTENSION IF NOT EXISTS "uuid-ossp" WITH SCHEMA public;
CREATE EXTENSION
Base Program #
Let’s get started by creating a base program which we’ll then use as a reference for the rest of the article. In this snippet we’ll do two things:
- Define a struct that is understandable by gorm
- Connect to the database we created earlier
package main

import (
	"time"

	"github.com/jinzhu/gorm"
	_ "github.com/jinzhu/gorm/dialects/postgres"
	uuid "github.com/satori/go.uuid"
	"github.com/sirupsen/logrus"
)

type product struct {
	ID        uuid.UUID `gorm:"primary_key;type:uuid;default:uuid_generate_v4()"`
	CreatedAt time.Time
	UpdatedAt time.Time
	DeletedAt *time.Time

	Name  string
	Price int
}

func main() {
	var db *gorm.DB
	var err error
	if db, err = gorm.Open(
		"postgres",
		"user=qor dbname=qor_tutorial password=password sslmode=disable",
	); err != nil {
		logrus.WithError(err).Fatal("Couldn't initialize database connection")
	}
	defer db.Close()
}
This is a minimal example and this post isn’t about gorm itself but about QOR so we’ll keep things simple. If you need more information on how to use gorm, please refer to my Gorm Gotchas post.
We’ll add a few migrations which you can find in
the code associated to this post.
These migrations (uuidCheck and initial) are used to check if the
uuid-ossp extension exists in the database we’re connecting to, and to create
our products table. Simply import the migrate package and run:
if err = migrate.Start(db); err != nil {
	logrus.WithError(err).Fatal("Couldn't run migration")
}
So we have a database and a model. Now we just want to add QOR Admin. But we want to use the gin router, so let’s head to the QOR documentation and find out how we can use QOR Admin with it.
adm := admin.New(&admin.AdminConfig{SiteName: "Admin", DB: db})
mux := http.NewServeMux()
adm.MountTo("/admin", mux)

r := gin.New()
r.Any("/admin/*resources", gin.WrapH(mux))
r.Run("127.0.0.1:8080")
Adding Resource #
Now let’s add our product model to our new admin interface:
// imports, db connection, etc.

adm := admin.New(&admin.AdminConfig{SiteName: "Admin", DB: db})
adm.AddResource(&product{})

// mux, gin, etc.
We can now head to 127.0.0.1:8080/admin to see our admin interface in action!
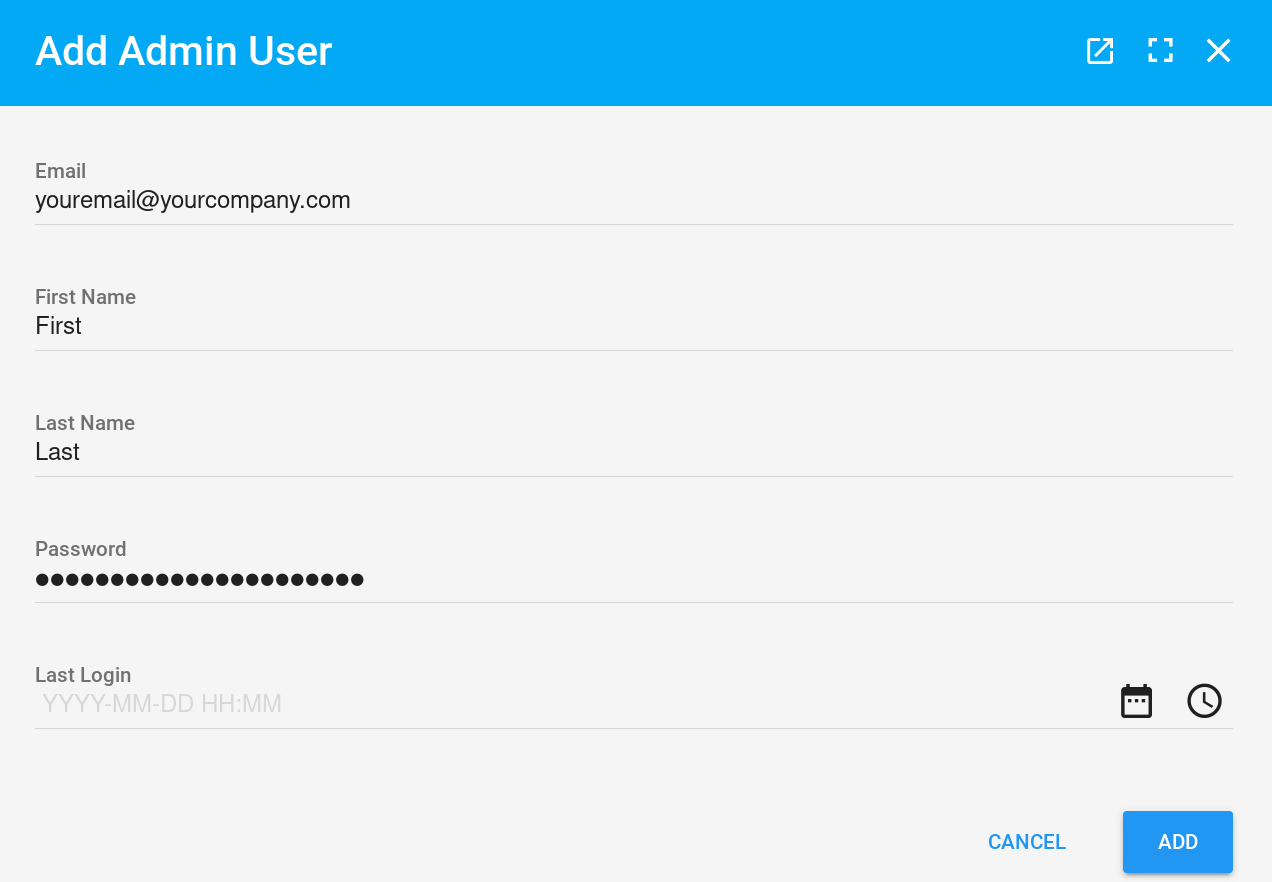
That’s it. Now our product model is successfully registered with QOR, we can interact with the data in our database, add/delete/edit products.
Authentication #

Now we have a nice looking admin interface which integrates our model and allows us to modify data in our database. But there’s no authentication in front of it, which is seriously problematic. Luckily, after a quick search on QOR’s Documentation we find a page about authentication here!
We’re told that we need to implement an interface. Well ok. How are we supposed to do that? Well we need to understand how a simple auth system works, cookies, forms and other stuff like that. So let’s get started.
Admin User Model #
The goal here is to create another table which will only contain our admin users for our admin interface (people that are allowed to login and do things). We don’t need a really complex one, just enough to identify people connecting on our admin interface, so let’s go with something like that:
// AdminUser defines how an admin user is represented in database
type AdminUser struct {
	gorm.Model
	Email     string `gorm:"not null;unique"`
	FirstName string
	LastName  string
	Password  []byte
	LastLogin *time.Time
}
Basic really. Email, name, password and last login operation. Security people I see you, don’t worry, the password won’t be clear text. We’re not barbarians. So we’re going to add a few methods:
// DisplayName satisfies the interface for Qor Admin
func (u AdminUser) DisplayName() string {
	if u.FirstName != "" && u.LastName != "" {
		return fmt.Sprintf("%s %s", u.FirstName, u.LastName)
	}
	return u.Email
}

// HashPassword is a simple utility function to hash the password sent via API
// before inserting it in database
func (u *AdminUser) HashPassword() error {
    pwd, err := bcrypt.GenerateFromPassword(u.Password, bcrypt.DefaultCost)
    if err != nil {
		return err
	}
	u.Password = pwd
	return nil
}

// CheckPassword is a simple utility function to check the password given as raw
// against the user's hashed password
func (u AdminUser) CheckPassword(raw string) bool {
	return bcrypt.CompareHashAndPassword(u.Password, []byte(raw)) == nil
}
The DisplayName() method will be used by QOR to display the user’s name in the
admin interface, or its email address if the FirstName and LastName fields
are not filled. And we’ll use bcrypt to hash our passwords. Now we need to
create that table and add our first user.
Migration #
If you read my previous post about gorm, you might know that I’m using a package
called gormigrate to handle
database migrations. This package is really useful because it allows to run
migrations and more importantly, to rollback if they fail. As I wrote in my
previous article, embedding your model inside the migration ensures the
migrations can be run in the right order even if you modify the main AdminUser
model. So let’s create our table, and immediately add our first admin user
with its email address and a changeme password.
import (
	"time"

	"github.com/jinzhu/gorm"
	"golang.org/x/crypto/bcrypt"
	gormigrate "gopkg.in/gormigrate.v1"
)

var initAdmin = &gormigrate.Migration{
	ID: "init_admin",
	Migrate: func(tx *gorm.DB) error {
		var err error

		type adminUser struct {
			gorm.Model
			Email     string `gorm:"not null;unique"`
			FirstName string
			LastName  string
			Password  []byte
			LastLogin *time.Time
		}

		if err = tx.CreateTable(&adminUser{}).Error; err != nil {
			return err
		}
		var pwd []byte
		if pwd, err = bcrypt.GenerateFromPassword([]byte("changeme"), bcrypt.DefaultCost); err != nil {
			return err
		}
		usr := adminUser{
			Email:    "youremailaddress@yourcompany.com",
			Password: pwd,
		}
		return tx.Save(&usr).Error
	},
	Rollback: func(tx *gorm.DB) error {
		return tx.DropTable("admin_users").Error
	},
}
Admin User in Admin #
If everything went well, you now have a new table called admin_users which
only contains one single record, the user you created in the migration. We’re
going to add the AdminUser model to our admin interface but we need to
define the behavior intended for the Password field. QOR Admin is great but
if you don’t tell it what to do with the data, it just puts it there. Meaning:
a clear text password if we modify our user in the admin interface and save it.
This is where QOR Admin can get tricky. We’ll be using the adm variable
that we created earlier in the minimal initial code. When you use AddResource
it returns a *Resource that can be fully customized. In the following code
snippet we’re going to define the behavior of the Password field. First we’re
going to remove this field from the index view (the list of our users), and then
we’re going to use Meta to change the way it is displayed as well as its
default behavior.
usr := adm.AddResource(&AdminUser{}, &admin.Config{Menu: []string{"User Management"}})
usr.IndexAttrs("-Password")
usr.Meta(&admin.Meta{
	Name: "Password",
	Type: "password",
	Setter: func(resource interface{}, metaValue *resource.MetaValue, context *qor.Context) {
		values := metaValue.Value.([]string)
		if len(values) > 0 {
			if np := values[0]; np != "" {
				pwd, err := bcrypt.GenerateFromPassword([]byte(np), bcrypt.DefaultCost)
				if err != nil {
					context.DB.AddError(validations.NewError(usr, "Password", "Can't encrypt password")) // nolint: gosec,errcheck
					return
				}
				u := resource.(*AdminUser)
				u.Password = pwd
			}
		}
	},
})
Well… The first two lines are pretty explicit. But the Meta function needs
a little more attention. First, we declare that this meta information is about
the Password field, and we define its type, it’s a password field so it should
be displayed like one.
Now the Setter. The setter is a function that is executed when a record is
edited or created. The first thing to do is to check if there is a changed
value or not. By checking the length of values (which needs to be type
asserted to a slice of string, because resource.MetaValue has many other uses)
we know if that field has been modified (or filled in the case of a new record)
or not. Then, in that specific case we know there’s only one value because
it’s a password input (so there can only be one value, the password).
Once we checked all that and got the actual value that was filled in the input,
we can use bcrypt to hash the password. If there’s an error, QOR has its own
way of handling it, we need to add said error to the context.DB that will
be displayed to our user if it’s not empty at the end of the query (meaning, you
can add more than one throughout your setter).
And once all that is done, we type assert
that the resource is of type AdminUser and we set its Password field to the
new password we just hashed.
Authentication with Gin #
QOR Admin’s expectations #
Now we have a database that contains both our application data (our products) and our admin users. What we need to do is allow a user to login, thus implementing the interface QOR Admin expects. This interface is composed of three functions:
type Auth interface {
  GetCurrentUser(*Context) qor.CurrentUser // get current user, if don't have permission, then return nil
  LoginURL(*Context) string // get login url, if don't have permission, will redirect to this url
  LogoutURL(*Context) string // get logout url, if click logout link from admin interface, will visit this page
}
The LoginURL and LogoutURL are not complex to implement, we’ll just tell
QOR where it should redirect users that are not authenticated or want to logout.
The last function we need to implement, on the other hand, is going to define
how we’ll identify users. For this, we’ll use
gin-contrib/sessions with a cookie
backend. We’re going to define a few things now:
- The session name: it can be anything, as long as it doesn’t collide with another session.
- The thing we’ll store in the cookie to identify the user: Let’s store its ID.
We also need an access to our database connection to check if the password is correct or even if the user exists.
type auth struct {
	db      *gorm.DB
	session sessionConfig
	paths   pathConfig
}

type sessionConfig struct {
	name  string
	key   string
	store cookie.Store
}

type pathConfig struct {
	login  string
	logout string
	admin  string
}

// GetCurrentUser satisfies the Auth interface and returns the current user
func (a auth) GetCurrentUser(c *admin.Context) qor.CurrentUser {
	var userid uint

	s, err := a.session.store.Get(c.Request, a.session.name)
	if err != nil {
		return nil
	}
	if v, ok := s.Values[a.session.key]; ok {
		userid = v.(uint)
	} else {
		return nil
	}

	var user models.AdminUser
	if !a.db.First(&user, "id = ?", userid).RecordNotFound() {
		return &user
	}

	return nil
}

// LoginURL statisfies the Auth interface and returns the route used to log
// users in
func (a auth) LoginURL(c *admin.Context) string { // nolint: unparam
	return a.paths.login
}

// LogoutURL statisfies the Auth interface and returns the route used to logout
// a user
func (a auth) LogoutURL(c *admin.Context) string { // nolint: unparam
	return a.paths.logout
}
There. Now, if there is a session containing a user ID that actually exists in our database, we’re good to go and QOR can safely give access to the admin interface. But how are we going to create said session? And allow users to login?
Gin Endpoints #
In order to properly handle our session, we’re going to need three endpoints:
GET /login- Renders a template with a login formPOST /login- Handles the form submission and checks data in databaseGET /logout- Destroys the session and redirects to /login
We can reuse our Auth structure because it already embeds the database, session and everything we need for those three endpoints. We’ll see the login template in the next section, let’s just see what it looks like from the backend point of view:
// GetLogin simply returns the login page
func (a *auth) GetLogin(c *gin.Context) {
	if sessions.Default(c).Get(a.session.key) != nil {
		c.Redirect(http.StatusSeeOther, a.paths.admin)
		return
	}
	c.HTML(http.StatusOK, "login.html", gin.H{})
}

// PostLogin is the handler to check if the user can connect
func (a *Auth) PostLogin(c *gin.Context) {
	session := sessions.Default(c)
	email := c.PostForm("email")
	password := c.PostForm("password")
	if email == "" || password == "" {
		c.Redirect(http.StatusSeeOther, a.paths.login)
		return
	}
	var u models.AdminUser
	if a.db.Where(&models.AdminUser{Email: email}).First(&u).RecordNotFound() {
		c.Redirect(http.StatusSeeOther, a.paths.login)
		return
	}
	if !u.CheckPassword(password) {
		c.Redirect(http.StatusSeeOther, a.paths.login)
		return
	}

	now := time.Now()
	u.LastLogin = &now
	a.db.Save(&u)

	session.Set(a.session.key, u.ID)
	err := session.Save()
	if err != nil {
		logrus.WithError(err).Warn("Couldn't save session")
		c.Redirect(http.StatusSeeOther, a.paths.login)
		return
	}
	c.Redirect(http.StatusSeeOther, a.paths.admin)
}

// GetLogout allows the user to disconnect
func (a *Auth) GetLogout(c *gin.Context) {
	session := sessions.Default(c)
	session.Delete(a.session.key)
	if err := session.Save(); err != nil {
		logrus.WithError(err).Warn("Couldn't save session")
	}
	c.Redirect(http.StatusSeeOther, a.paths.login)
}
When the user submits the form with his credentials, the endpoint checks in the
database if the user exists and if the provided password matches the one stored
in database. If both conditions match, then we update the LastLogin field of
our user, save it in database, update its session and redirect it to the admin
interface endpoint. Upon reaching this endpoint, the GetCurrentUser function
is executed and now returns our user because it has the proper session values,
thus granting access to the admin.
Wrapping things up #
Now that things are getting a bit complicated with all that code floating around
let’s wrap things up and organize our stuff. Since our goal here is to create
a mostly independent package that initializes our admin interface, we’ll create
a new package named admin. In there we’ll try to wrap all the things we did
earlier.
We’ll create a admin/user.go which will contain both our admin user model and
our migration. Since the package is already called admin we’ll simply rename
it User, and add the function that adds our user to the admin interface in
that same file. We’ll also add a function that tells gorm the table name since
we changed the name of our model:
// User defines how an admin user is represented in database
type User struct {
	gorm.Model
	Email     string `gorm:"not null;unique"`
	FirstName string
	LastName  string
	Password  []byte
	LastLogin *time.Time
}

// TableName allows to override the name of the table
func (u User) TableName() string {
	return "admin_users"
}
Let’s do the same for our authentication system, place it in a admin/auth.go
file. We now have a separate package that contains everything needed to use
QOR Admin as well as our authentication system. Our business models and admin
models are now separated too, thus not polluting the main package. The admin
user migration is now separated in another package too, which we need to import
during our migration phase.
Our admin/admin.go can now be simplified like this:
package admin

import (
	"path/filepath"

	"github.com/gin-contrib/sessions/cookie"
	"github.com/gin-gonic/gin"
	"github.com/jinzhu/gorm"
	"github.com/qor/admin"

	"github.com/Depado/articles/code/qor/models"
)

// Admin abstracts the whole QOR Admin + authentication process
type Admin struct {
	db        *gorm.DB
	auth      auth
	adm       *admin.Admin
	adminpath string
	prefix    string
}

// New will create a new admin using the provided gorm connection, a prefix
// for the various routes. Prefix can be an empty string. The cookie secret
// will be used to encrypt/decrypt the cookie on the backend side.
func New(db *gorm.DB, prefix, cookiesecret string) *Admin {
	adminpath := filepath.Join(prefix, "/admin")
	a := Admin{
		db:        db,
		prefix:    prefix,
		adminpath: adminpath,
		auth: auth{
			db: db,
			paths: pathConfig{
				admin:  adminpath,
				login:  filepath.Join(prefix, "/login"),
				logout: filepath.Join(prefix, "/logout"),
			},
			session: sessionConfig{
				key:   "userid",
				name:  "admsession",
				store: cookie.NewStore([]byte(cookiesecret)),
			},
		},
	}
	a.adm = admin.New(&admin.AdminConfig{
		SiteName: "My Admin Interface",
		DB: db,
		Auth: a.auth,
	})
	addUser(a.adm)
	a.adm.AddResource(&models.Product{})
	return &a
}
You can see the admin package here.
The login template #
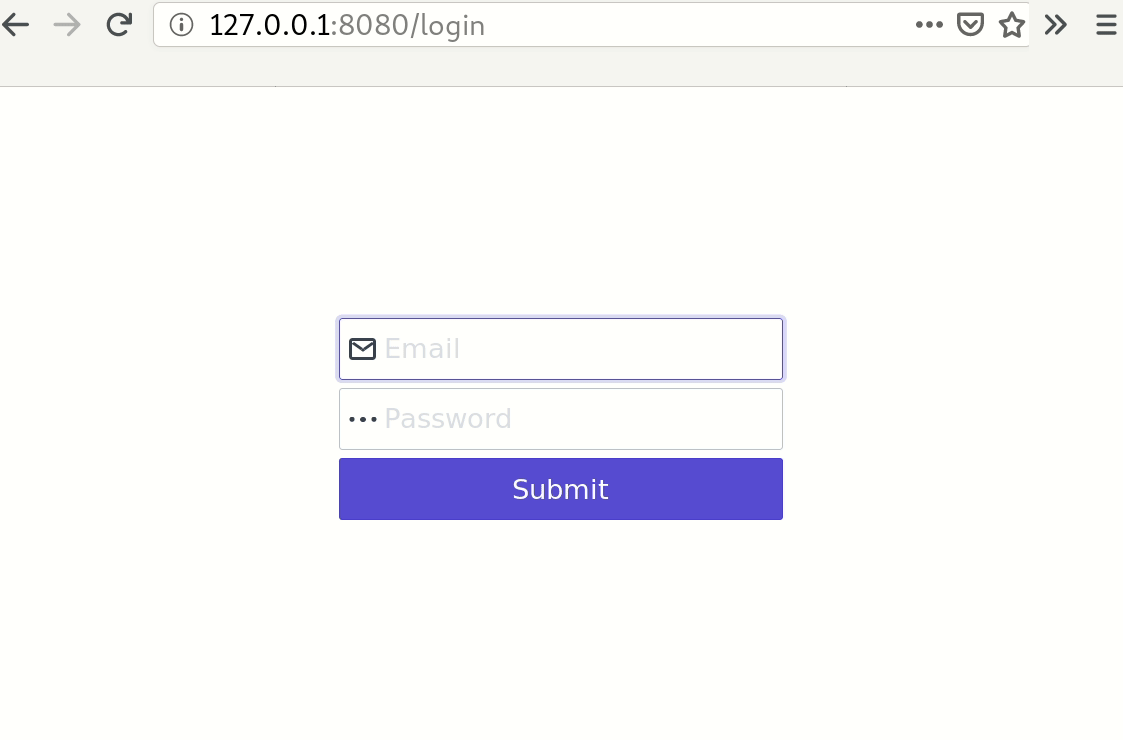
One issue left is the login template which needs to be served so our user is
faced with a nice looking login form when attempting to reach the admin
interface. For now, we’ll just add this file inside a templates directory. This template is a simple HTML file
with a vertically/horizontally centered login form using
spectre.css.
Router binding #
Now we have everything we need to bind ourselves to an already existing gin router!
func (a Admin) Bind(r *gin.Engine) {
	r.LoadHTMLGlob("admin/templates/*")

	mux := http.NewServeMux()
	a.adm.MountTo(a.adminpath, mux)

	g := r.Group(a.prefix)
	g.Use(sessions.Sessions(a.auth.session.name, a.auth.session.store))
	{
		g.Any("/admin/*resources", gin.WrapH(mux))
		g.GET("/login", a.auth.GetLogin)
		g.POST("/login", a.auth.PostLogin)
		g.GET("/logout", a.auth.GetLogout)
	}
}
Note that we are currently loading our login.html template directly. This will
change when we’ll see how to embed all your assets in the binary. And now we
just have to modify our main.go and see how easy it is to use our new package!
r := gin.New()
a := admin.New(db, "", "secret")
a.Bind(r)
r.Run("127.0.0.1:8080")
Deployment and Bindatafs #
Why? #
There is a deployment section in the QOR Admin docs. The issue here is that QOR Admin serves its own templates/css/js files from your filesystem when you use it. Basically, when you import QOR Admin and bind it to a router, it starts serving its own assets from the directory where it is installed. This is problematic when deploying to production, because we need a way to either embed the assets directly inside the binary or ship our binary with all the assets alongside. BindataFS solves the first problem, embedding assets inside our binary.
This part was tricky. As in, really tricky and it took me a lot of time to actually understand what was going on.
Install & Initialize #
First we’ll install BindataFS, and initialize it inside a directory in our
admin directory. I’m assuming you followed the article to this point and have
a directory structure with an admin directory which holds all the things
related to QOR Admin. If not, then initialize bindatafs where you like, just
remember the path where you did it.
$ go get -u -f github.com/qor/bindatafs/...
$ # You will also need this:
$ go get -u github.com/containous/go-bindata
$ bindatafs admin/bindatafs
Initalizing BindataFS...
copy from .../src/github.com/qor/bindatafs/templates to admin/bindatafs
$ tree
├── admin
│   ├── admin.go
│   ├── auth.go
│   ├── bindatafs
│   │   ├── bindatafs.go
│   │   └── templates.go
│   ├── templates
│   │   └── login.html
│   └── user.go
…
So bindatafs created a directory where we told it, and added two files:
templates.go and bindatafs.go. Alright cool. But now we want to compile
QOR’s assets.
Finding QOR Admin’s Assets #
We’re going to create a new package inside our admin package, and name it
compile with a main.go inside it. This program will do a simple thing:
Find and compile QOR Admin’s assets, as well as our login template. Because
of course we also need to take care of our login.html template!
You can find this file here.
This program will search in the most common places of package installation and
will look for a package that contains the views directory (containing the
assets). Of course you’ll need to tweak the import path of the bindatafs
package to match your own bindatafs path. It will search in the following
directories:
$GOPATH/pkg/mod/$GOPATH/src/./vendor/
This program is not perfect though, for example it doesn’t know whether you’re using gomodules or not, it will just grab the first version of QOR it finds.
$ go run admin/compile/main.go
DEBU[0000] Found QOR Views Directory path=…/Go/pkg/mod/github.com/qor/admin@v0.0.0-20190116035234-0f96b498bae7/views
DEBU[0000] Highest candidate found   path=…/Go/pkg/mod/github.com/qor/admin@v0.0.0-20190116035234-0f96b498bae7/views
Compiling templates...
Once our program found the highest candidate, it will register it using the
bindatafs we imported at the top of the file, which is, your bindatafs.
Now some things happened in your admin/bindatafs directory:
- You now have a huge
templates_bindatafs.gofile - You now have a
templates/directory containing the assets separated by namespaces that bindatafs grabbed from the directories you gave it
How does that work then? You may notice at the start of the
templates_bindata.go that there’s a compilation instruction:
// +build bindatafs. Meaning this file will be ignored at compile time if
you don’t pass the -tags 'bindatafs' when running go build or go run. If
you omit this flag, then the local filesystem is used, and that’s why bindatafs
copied the assets in a large templates/ directory.
Using BindataFS #
Now that we have successfully found QOR Admin’s assets and used bindatafs to
compile them as well as our login template, we need to modify our admin.go
file to reflect the changes. First let’s modify our New func so that our
admin interface uses bindatafs:
import (
		//	…
		"github.com/Depado/articles/code/qor/admin/bindatafs"
)
// …
func New(db *gorm.DB, prefix, cookiesecret string) *Admin {
	// …
	a.adm = admin.New(&admin.AdminConfig{
		SiteName: "My Admin Interface",
		DB:       db,
		Auth:     a.auth,
		AssetFS:  bindatafs.AssetFS.NameSpace("admin"),
	})
	// …
}
Then we’ll modify our Bind function so that our login template is also loaded
from bindatafs:
func (a Admin) Bind(r *gin.Engine) {
	mux := http.NewServeMux()
	a.adm.MountTo(a.adminpath, mux)

	lfs := bindatafs.AssetFS.NameSpace("login")
	lfs.RegisterPath("admin/templates/")
	logintpl, err := lfs.Asset("login.html")
	if err != nil {
		logrus.WithError(err).Fatal("Unable to find HTML template for login page in admin")
	}
	r.SetHTMLTemplate(template.Must(template.New("login.html").Parse(string(logintpl))))

	g := r.Group(a.prefix)
	g.Use(sessions.Sessions(a.auth.session.name, a.auth.session.store))
	{
		g.Any("/admin/*resources", gin.WrapH(mux))
		g.GET("/login", a.auth.GetLogin)
		g.POST("/login", a.auth.PostLogin)
		g.GET("/logout", a.auth.GetLogout)
	}
}
BindataFS Build #
Now that we registered our assets with bindatafs and modified our admin methods to handle them, this allows us to do two things:
go run main.gowill run our code and use assets that are on diskgo run -tags 'bindatafs' main.gowill run our code but will embed our assets in the generated binarygo build -tags 'bindatafs'will compile our code to a static binary and embed all your assets in said binary, thus allowing us to deploy it without worrying about assets
Handling Unsupported Types #
pq.StringArray #
In my gorm post I recently added a section on how to
handle a specific type of column in PostgreSQL: arrays. The trick is to use
pq.StringArray as the column type in your model because even though under the
hood it’s just a []string, it implements the
driver.Valuer and
sql.Scanner interfaces so that
gorm knows how to handle this type.
This is what you need to do if you ever want to implement your own type of data as a column.
Adding Tags to Product #
Let’s assume we just added a new column (a new field) in our Product struct.
We also need to create a new migration to handle properly this new field. This
is the perfect case for gorm’s AutoMigrate feature that detects model changes
and reflect them in the database.
type Product struct {
	ID        uuid.UUID `gorm:"primary_key;type:uuid;default:uuid_generate_v4()"`
	CreatedAt time.Time
	UpdatedAt time.Time
	DeletedAt *time.Time

	Name  string
	Price int
	Tags  pq.StringArray `gorm:"type:varchar(100)[]"`
}
var productTags = &gormigrate.Migration{
	ID: "product_tags",
	Migrate: func(tx *gorm.DB) error {
		type product struct {
			ID        uuid.UUID `gorm:"primary_key;type:uuid;default:uuid_generate_v4()"`
			CreatedAt time.Time
			UpdatedAt time.Time
			DeletedAt *time.Time
			Name      string
			Price     int
			Tags      pq.StringArray `gorm:"type:varchar(100)[]"`
		}
		return tx.AutoMigrate(&product{}).Error
	}, Rollback: func(tx *gorm.DB) error {
		type product struct {
			ID        uuid.UUID `gorm:"primary_key;type:uuid;default:uuid_generate_v4()"`
			CreatedAt time.Time
			UpdatedAt time.Time
			DeletedAt *time.Time
			Name      string
			Price     int
			Tags      pq.StringArray `gorm:"type:varchar(100)[]"`
		}
		return tx.Model(&product{}).DropColumn("tags").Error
	},
}
QOR Admin and Tags #
If we try to run our admin again, it will work, but upon opening the edit or create views for our products, this happens:
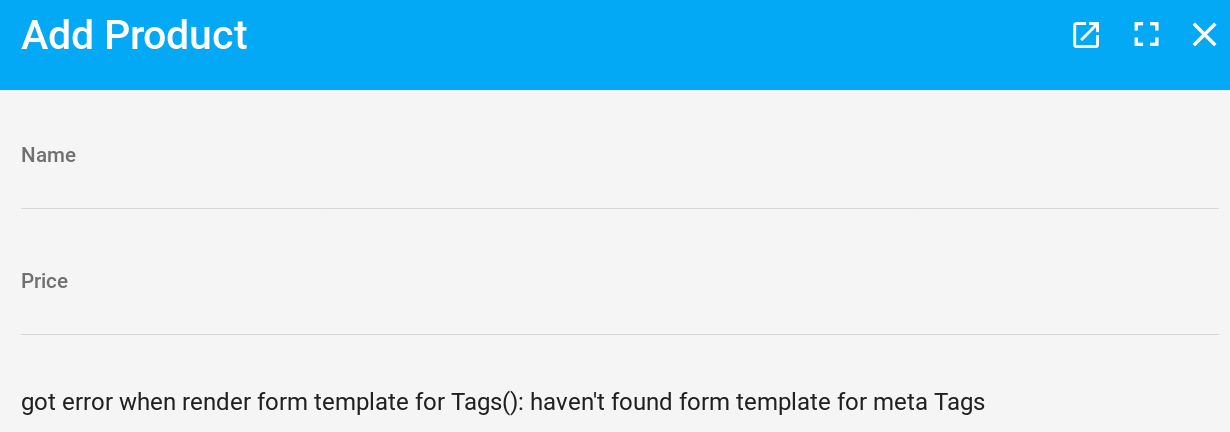
The error is not very clear, but this means that QOR Admin has no idea on how to render this kind of field. So we are going to tell QOR what to do with that. The easiest way I found to edit this kind of field is to display it as a comma-separated input.
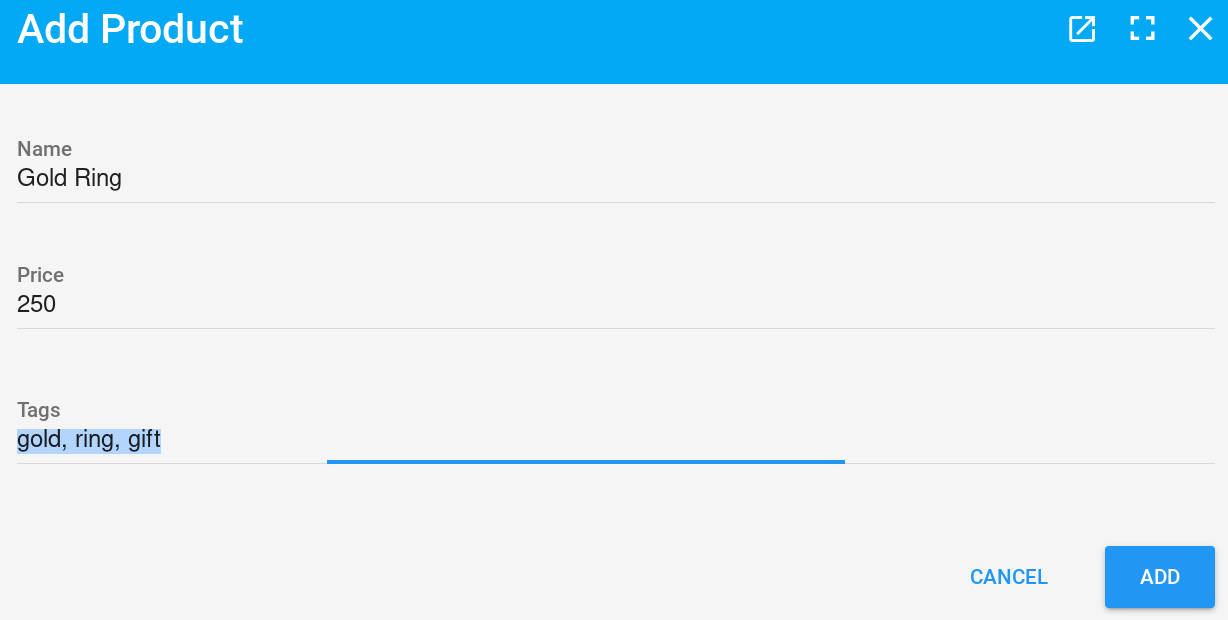
So let’s add a Meta to our Product admin interface, just like we did for our user’s password:
func AddProduct(adm *admin.Admin) {
	p := adm.AddResource(&models.Product{})
	p.Meta(&admin.Meta{
		Name: "Tags",
		Type: "string",
		Valuer: func(record interface{}, context *qor.Context) (result interface{}) { // nolint: unparam
			s := record.(*models.Product)
			var out string
			for _, t := range s.Tags {
				if out == "" {
					out = t
					continue
				}
				out = fmt.Sprintf("%s, %s", out, t)
			}
			return out
		},
		Setter: func(record interface{}, metaValue *resource.MetaValue, context *qor.Context) { // nolint: unparam
			s := record.(*models.Product)
			values := metaValue.Value.([]string)
			s.Tags = pq.StringArray{}
			if len(values) > 0 && values[0] != "" {
				tags := strings.Split(values[0], ",")
				for _, t := range tags {
					s.Tags = append(s.Tags, strings.TrimSpace(t))
				}
			}
		},
	})
}
Display Tweak #
We can now edit our tags. But it looks kind of ugly in our index view. This
step is entirely optional and just adds some style. One trick to display some
pretty tags in our index view, is to not display the Tags column, but add a
new virtual field called Tag:
p.IndexAttrs("ID", "Name", "Price", "Tag")
p.EditAttrs("Name", "Price", "Tags")
p.NewAttrs("Name", "Price", "Tags")
p.Meta(&admin.Meta{
	Name: "Tag",
	Valuer: func(record interface{}, context *qor.Context) interface{} { // nolint: unparam
		p := record.(*models.Product)
		var out string
		var tot int
		badge := `<span style="background-color: rgb(33,150,243); padding: 5px; border-radius: 25%%; color: white; margin-right: 5px;">%s</span>`
		for _, t := range p.Tags {
			if tot+len(t) >= 30 {
				more := fmt.Sprintf(badge, "…")
				out = fmt.Sprintf("%s%s", out, more)
				break
			}
			tot += len(t)
			tt := fmt.Sprintf(badge, t)
			if out == "" {
				out = tt
				continue
			}
			out = fmt.Sprintf("%s%s", out, tt)
		}
		return template.HTML(out) // nolint: gosec
	},
})
A few notes here. First, we’re going to explicitly define the fields that are
displayed depending on the action we’re doing:
- On the index view (the list), we want to see our new “friendly” Tag field
- But when editing or creating, we want to see our Tags field (our string input)
This virtual field is computed and returns some HTML span elements with embedded style. Of course this is not the prettiest way of doing things, but it works and it renders pretty well on our index:
Thanks #
- klx” for proofreading this post ♥
- Gin-Gonic Framework Logo by Javier Provecho is licensed under a Creative Commons Attribution 4.0 International License.
- Scientist Gopher by marcusolsson from the gophers repo